Accounts Payable> Programs> AP Transaction Entry
APT1. Create a new batch and the current month
If you're at the end of the month, pay close attention to your batch month.
**Example if it's the beginning of December you'll be entering batches in November & December until the previous month has been closed
If there is an existing batch you started you can select the "Use an existing batch" and continue your work

Info Tab
APT2. In the #seq tab type "n" or "+" and enter for a new sequence (invoice)

APT3. Go into the "Vendor" tab and press F4 to to pull up the AP Vendors

APT4. Press f4 and select the correct vendor on your invoice.

TIP: "*" and typing the key words can help you pull up a vendor quicker
Some accounts will have two vendor accounts, 9000+ indicates credit card vendor.

APT5. AP reference to enter the invoice number. Go into your invoice and review the invoice number to pull this information.
If there is no invoice number use the invoice date or date of entry YYYYMMDD

APT6. Enter your invoice date

APT7. The due date will auto populate once it is entered based on AP Vendor net terms set up
If this is not accurate you can manually enter and make a correction in AP Vendor net terms.
**Discount Date is only to be input if it clarifies on the invoice for a discount date or by Vendor (this is usually referenced on the invoice or set up in AP Vendor)

APT8. Enter the description, this is a summary of what the invoice is.
If you can't find a description summarize the invoice.
Is there a PO?
What is it for?

APT9. Enter in the gross amount on your invoice (we will break apart any tax on the bottom section of the program)

ℹ️ We have completed the top of the AP Transaction Entry
APT10. On the Line field type n or + to create a new line entry below
You'll create multiple lines if you need to break apart sections of an invoice.
Example Insurance:
Medical Benefits
Dental Benefits

APT11. Select your expense type.
1-Job (Is this going to a job, phase, and cost type)
3-Expense (Does this need to be expensed to a GL Account?)
4-Equip (Is this for a piece of equipment in EM, equipment, cost code, cost type)

APT12. Once you have selected expense move to GL Account tab and select F4
This could auto populate if this is connected to a piece of equipment or job. That will be the GL you want.

APT13. If there is tax, enter the Gross amount to reflect BEFORE tax
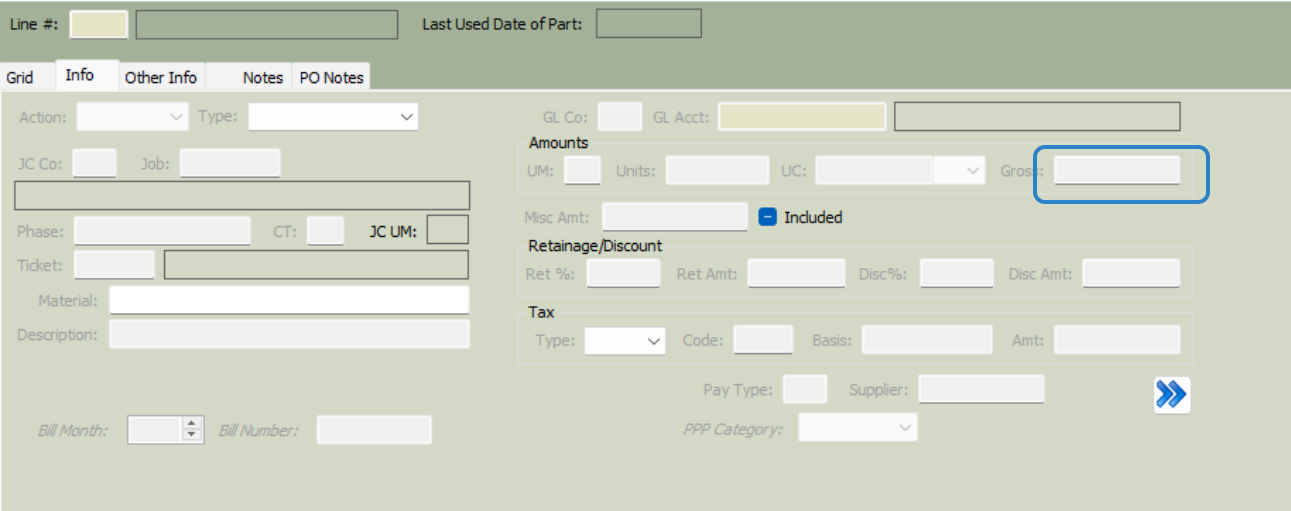
APT14. Code is where you'll input your tax code - press F4 and select the correct code
This varies by location
https://dor.wa.gov/taxes-rates/sales-use-tax-rates/local-sales-use-tax
This website is helpful as you can refer to their excel that lists codes based on locations for Washington State (other states vary)
Our Washington tax codes are input with WA first
Example
WA-0605 is going to be what you use in Vancouver
WA-0605E is what you select if they are exempt for tax at that specified vendor
WA-0605PR is if it's Public Road

APT15. Once your have your information complete, select the floppy disc icon again to save all of your work

APT16. Click into the vendor tab

APT17. Drag the invoice into the top part of AP Unapproved Invoice Entry
It's important to make sure you're in the top portion or it won't attach to the correct spot

APT18. Close

APT19. Check the paperclip symbol to see if there is a blue circle, this shows us it attached correctly

APT20. Now select File

APT21. Select Process Batch

APT22. Next press Validate

APT23. Select Post

APT24.Select Close

APT25. You should receive to process in prepaid, hit yes
APT26. AP Prepaid Process program will open
APT27. Select Update
APT28. Verify entries and select Post
APT29. Post Batch
ℹ️ SPECIAL - IF YOU HAVE TO ENTER A BANK TRANSACTION OR CREDIT CARD AS ALREADY PAID
Payment Overrides Tab
APTPP1. Select Payment Method "Check"
APTPP2. Press f4 and select the correct CM Account.
APTPP3. Check the Prepaid Transaction Box
APTPP4. Check/Epay YYYYMMDD
 If Vista displays the message below, add a "1" at the end of the YYYYMMDD. If the message appears again, start with a "2" and keep increasing the number on the end of the YYYYMMDD until you find one that is available.
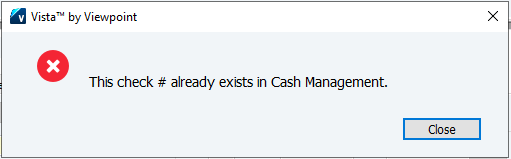
APTPP5. Enter paid date
APTPP6. Enter paid month
APT7. Now select File

APT8. Select Process Batch

APT9. Next press Validate
APT10. Select Post
APT11.Select Close
ℹ️ SPECIAL - IF YOU HAVE TO OPEN AN AP TRANSACTION TO EDIT.
Go back into AP Transaction Entry

45. Create batch in the same month

46. Select Add Transaction

47. Press F4 to find your AP transaction

48. You can do this in any column, I chose the description

49. Select OK

50. Select Add Batch

51. Select Yes

52. Select Yes if you want to add another, select no if you do not.

53. In the dropdown if you wish to edit select change, if you wish to delete select delete

54. Once you have finished your changes go into File
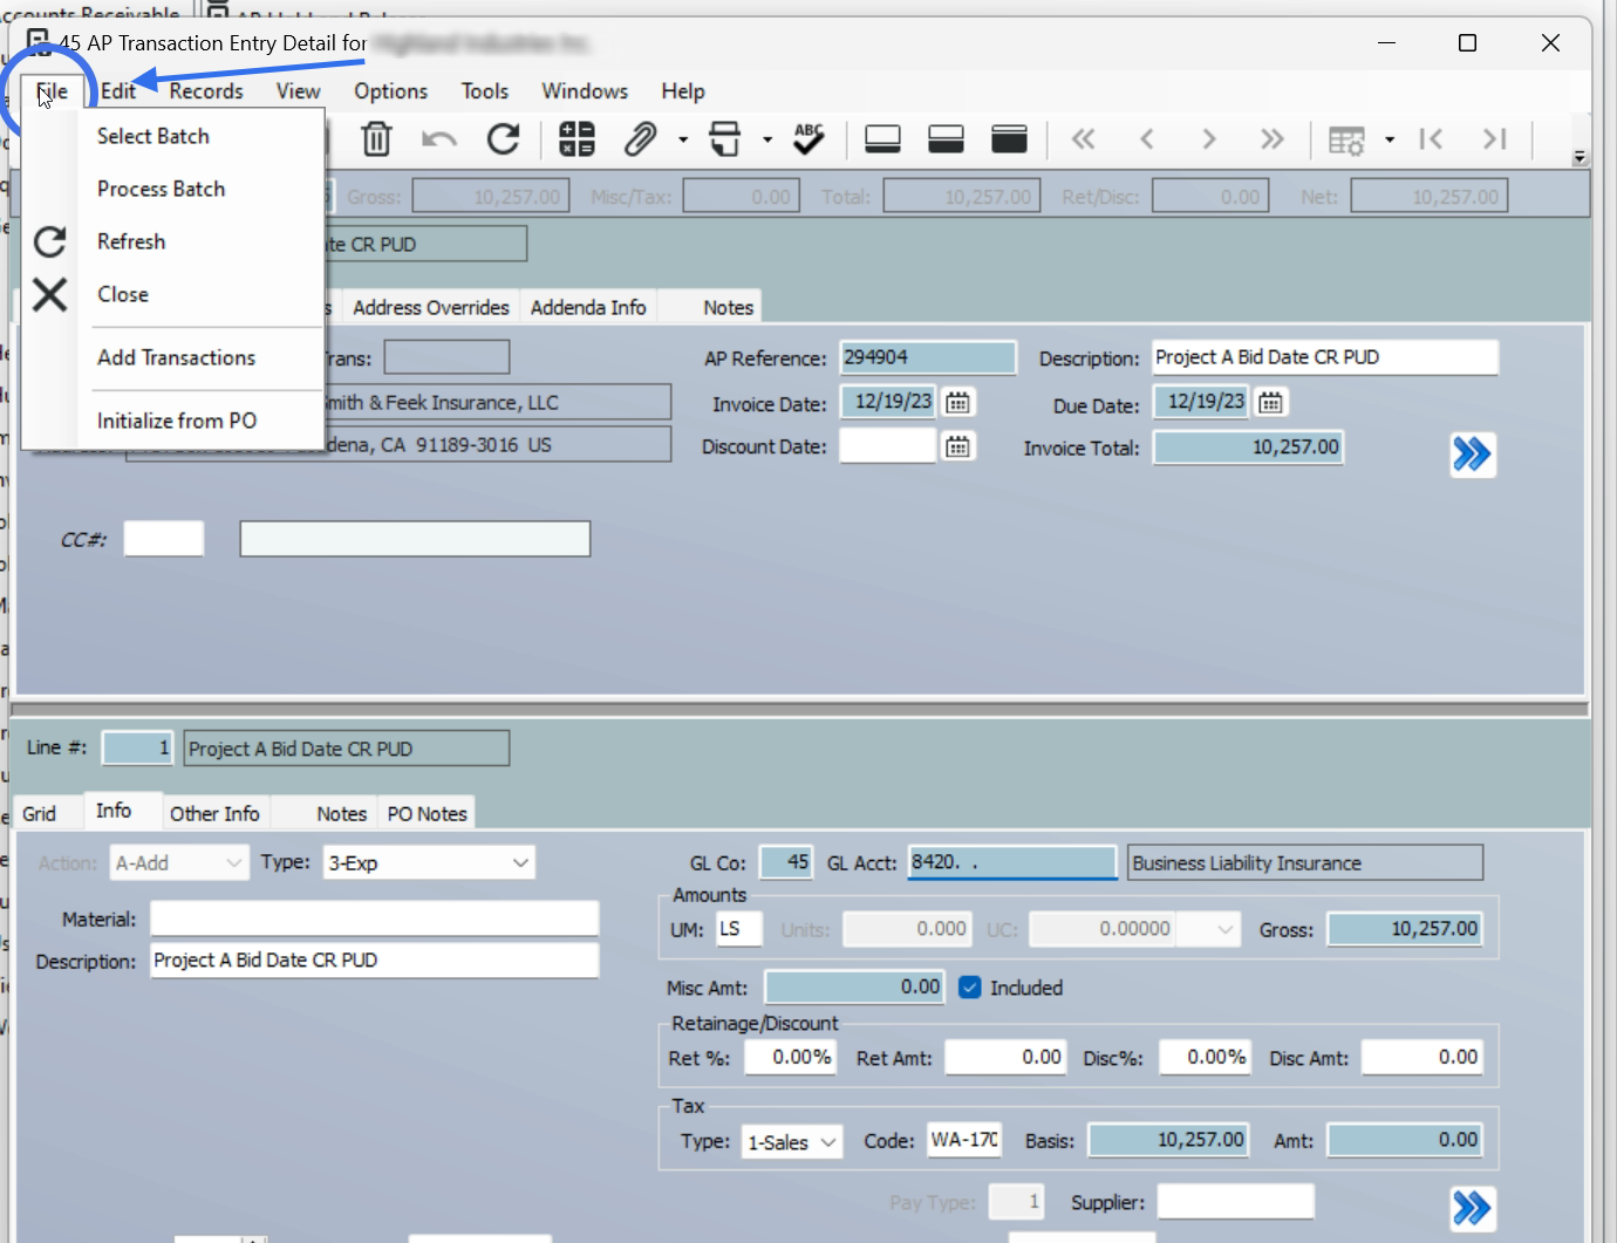
55. Go into process batch

56. Validate the batch

57. Select post batch

58. Select OK

Was this article helpful?
That’s Great!
Thank you for your feedback
Sorry! We couldn't be helpful
Thank you for your feedback
Feedback sent
We appreciate your effort and will try to fix the article